|
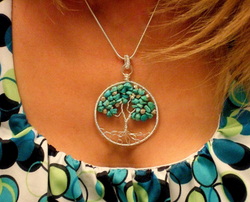
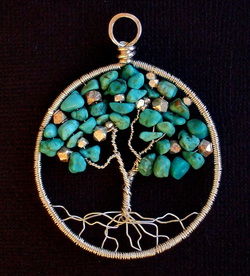
I've been busy with some commissioned pieces and thought I'd share one of them. This is the first Tree of Life I've done in silver, and I love the look. It's fine silver with turquoise. The other trees have all been in copper, which has a beautifully organic, rustic look. This gives the design an entirely new flavor. I seriously want one for myself. This one is destined for a new bride's future mother-in-law. A Tree of Life is such a perfect gift for that, don't you think? A statement piece, a treasured keepsake, a future heirloom... so symbolic as families join together. This is an early post because I may be out of town for a few days. If so, this will have to be my Wednesday post. A little break from fold forming... can't wait to get back to it.
2 Comments
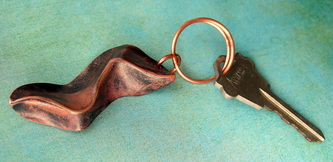
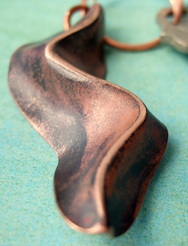
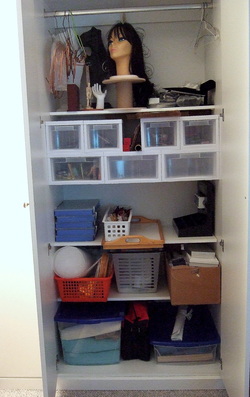
I have to say, I struggled with this particular fold form technique. It starts with a flat sheet of copper that is scored with a steel wire, and then creased into a 3-dimensional wave. I started with a piece of aluminum and split the entire thing. Trashed. I think it was too thick. This piece went through several rounds of annealing and bending before I began figuring out how to shape it. The wave shape can be used as a component for jewelry or sculpture. My piece barely passes for use with a key chain... but it was a good lesson. That's all I have this week! I've been working on my studio again. It has a large cabinet that was used for household storage and had only a rod for hanging clothes. Things were just piled up in there. I've added shelves, drawers, and containers inside -- and got rid of everything unrelated to art in the studio. Finally! I'm also adding some peg boards for tools and improving the layout in the room. Things are still at that messy stage that happens right before you finish organizing, but there is light at the end of the tunnel. Want to see? "Before" (A flattering pic of me, don't you think?) "After" (Don't let the head scare you. She models my hair accessories.) Ahhh... this makes me happy :-D
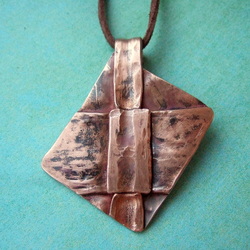
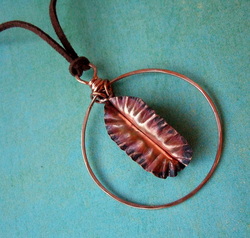
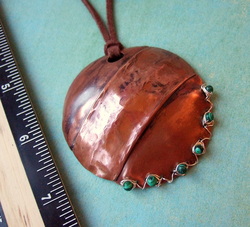
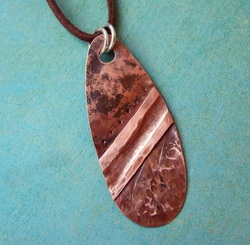
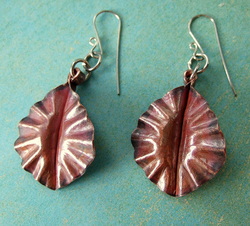
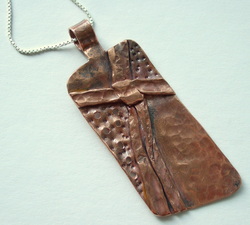
In case you'd like further insight into my often-impulsive design techniques, here is the massively scientific method I used on the first pendant, below... 1. Start with a big sheet of copper. 2. Practice a new fold form technique -- in this case, a cross-over pattern. 3. Cut a rectangle out of a sheet of paper approximately the size of a pendant, and throw away the rectangle. Hold the paper like a frame over various parts of the hammered copper, tilting it this way and that, until you say "That's cool!" 4. Lay the paper on the copper at the chosen angle, and mark the shape on the metal with a sharpie pen. 5. Cut out the metal. Voila! So here you go, this week's fold form projects... This one is a brainstorm I had combining my favorite hoop earring design with a leaf. Actually, I think I might make some earrings like this and keep them for myself :) This was an experiment to see how large of a sheet I could handle with the torch I have now. I desperately need a new torch. I couldn't quite anneal (heat to a red glow) a 10" sheet but trying that did inspire me to make my biggest pendant ever. Not for everyone perhaps, but a statement for the right person! The stitching is sterling silver and the gemstones are malachite. I'm pretty sure I'm going to work on a link necklace to hang it on, so you may see this again. And finally a simple teardrop pendant just over 2" long. None of these designs have soldered parts or more than one piece of metal. They begin as a flat sheet of copper and are folded / forged into organic, 3- dimensional shapes.
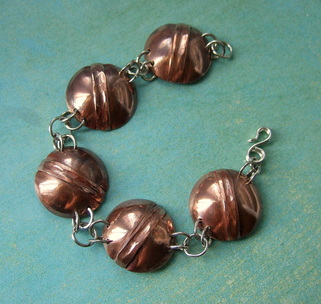
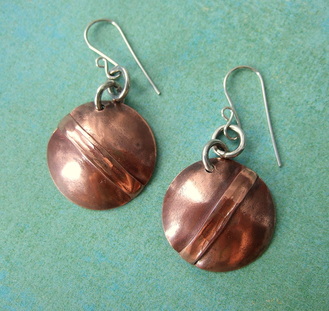
There is a completely different fold form technique that I'd like to do next. It looks difficult but oh so cool. I'm not overly confident about how it will turn out, but I promise to post a pic even if it turns out badly. Wish me luck and tune in for next week's episode...! Yesterday I took all my fold form jewelry over t0 the Ohio Craft Museum gift shop. I'm so pleased to have my jewelry there -- I love love love working with those guys. If you have a chance to visit the museum you won't be disappointed. They have amazing 6-week-long art exhibits throughout the year, and you can see more about them (including exhibit schedule) at www.ohiocraft.org . Right now they have their annual juried members exhibition and the stuff is gorgeous. These were my fold form projects this week. A circle link bracelet to go with last week's nested circle pendant... Some matching earrings for my mom... (Happy birthday, mom!) Some leaf earrings... And a pendant... I haven't quite decided whether the pendant belongs on a chain by itself, or should be part of a more complex necklace. Let me know what you think.
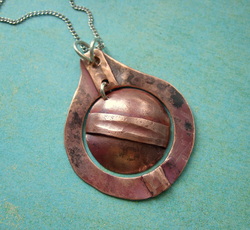
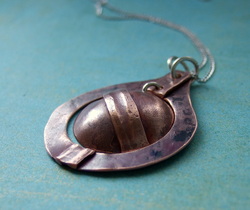
See you next Wednesday! So much of my design work is unplanned. People often ask if I draw my designs on paper before starting the piece, and sometimes I do -- but most often I have an abstract idea and go with it. As I'm working on it, the shapes suggest the path and the path finds its way. Not very scientific ;-) but my kind of fun. For this pendant, I intended to pair up the circle with another geometric shape I had already made. However, the scrap that was left after cutting the circle was by far the coolest of the three pieces. So I used it to frame the circle and left the original shape out completely. I hope you'll stop by next Wednesday to see another fold forming project. Have a great week!
|
Sue Lacy WiredThis began as a hobbyist's blog. Over time it became a quest to support & connect metalsmiths around the globe who use foldforming techniques in their work. See how it all turned out: www.foldforming.org Archives
July 2016
|
