|
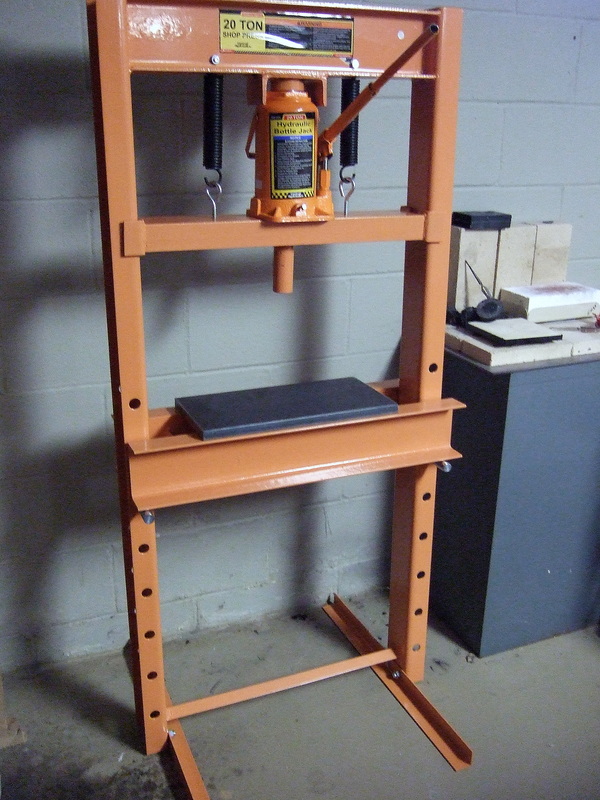
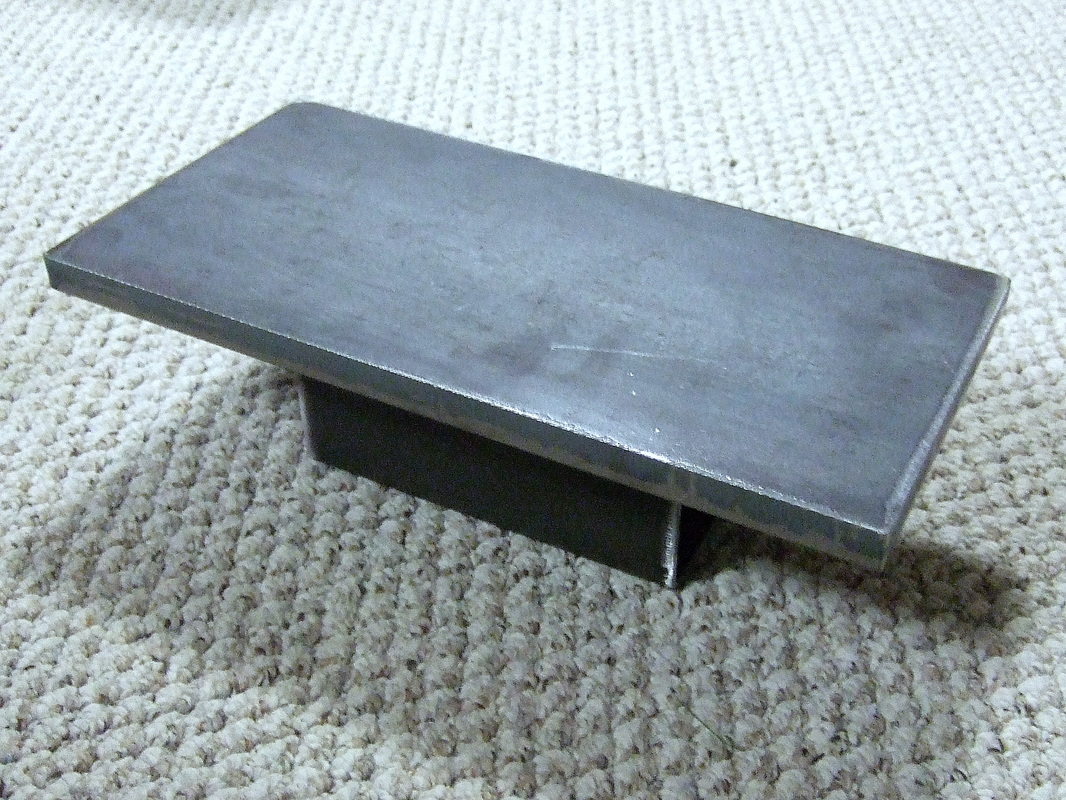
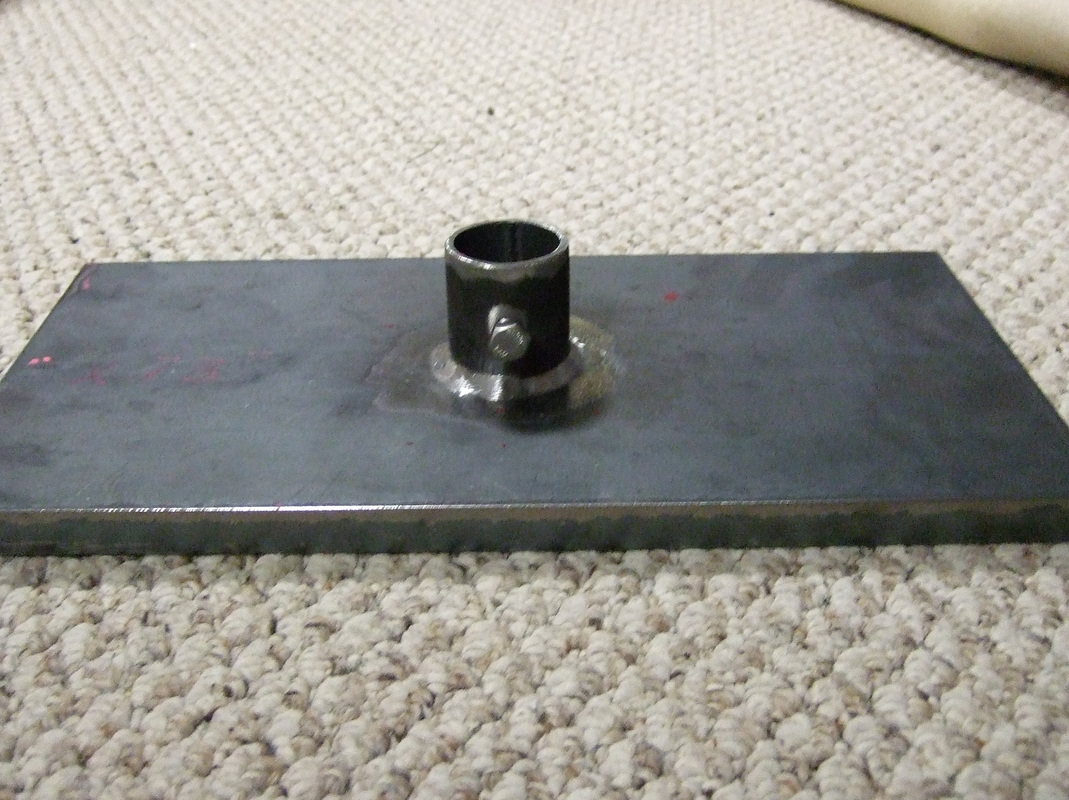
There are some great hydraulic presses made especially for use with jewelry and small metals. My budget isn't up for that right now so I went to Harbor Freight and bought one for $199. Then I hired a local craftsman to make two 8x12" removable platens-- and it works like a charm. 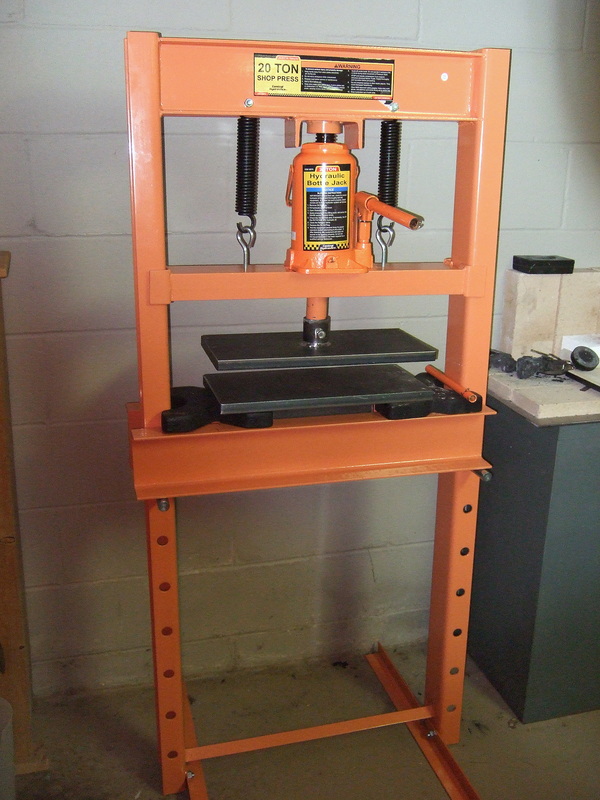 Harbor Freight 20 ton hydraulic press (modified) Harbor Freight 20 ton hydraulic press (modified) (Update 1/31/2015: If you're researching this topic, read the comments people are leaving below. Lots of advice and important viewpoints to consider.) So yeah, Harbor Freight is always good for starting a heated discussion about cost vs. quality and you get what you pay for. No denying that. I'm super happy with some products and not so much with others. Should you decide to embark on a similar adventure, my disclaimer is that your results may vary. Be safe, be careful, do your own research-- at your own risk. This is just my story to share. Before assembling the press, I took the two middle crossbars to Fortin Ironworks, a local metal fabrication shop here in Columbus, OH. They viewed an image of the assembled press on Harbor Freight's website, measured the crossbars, and proposed a design. Two days later the parts were ready. The job cost $107 for labor and all that steel. So this 20 ton hydraulic press ended up costing me about $300. VERY nice. Bottom Platen This is the new bottom platen. The craftsman suggested a removable solution to retain flexibility in how the press can be used. He welded a section of large square pipe to the plate and it drops right between the crossbars of the press to keep it securely in place.
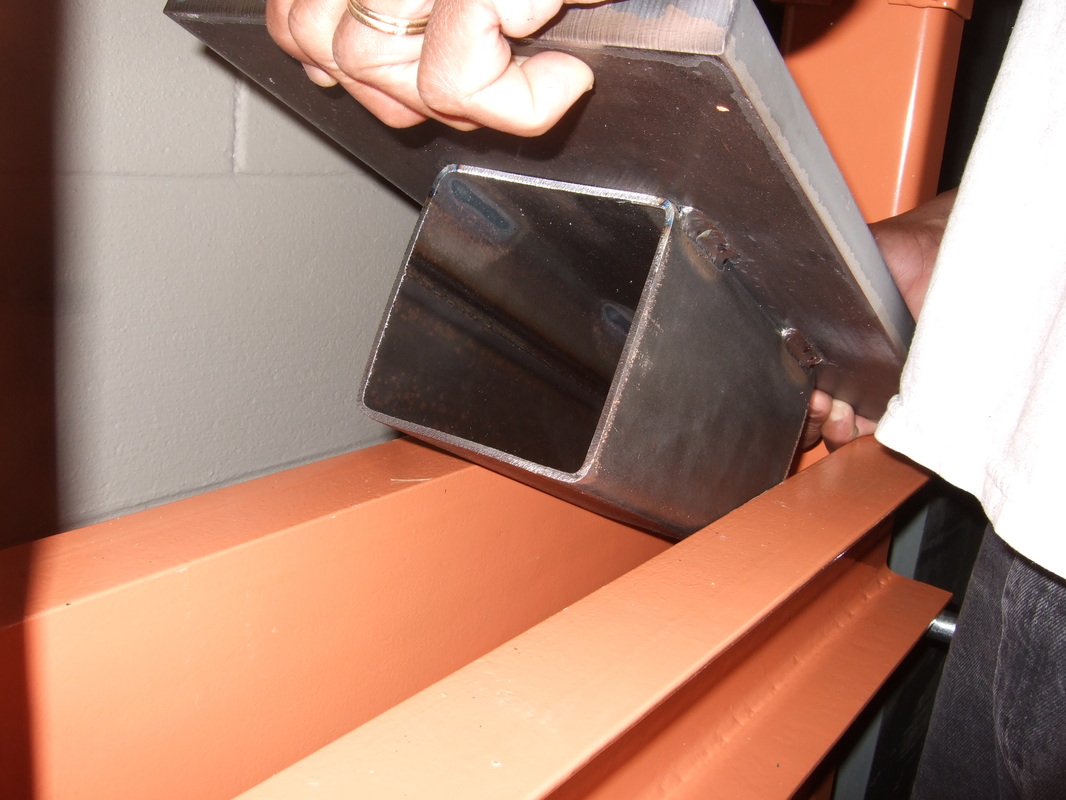
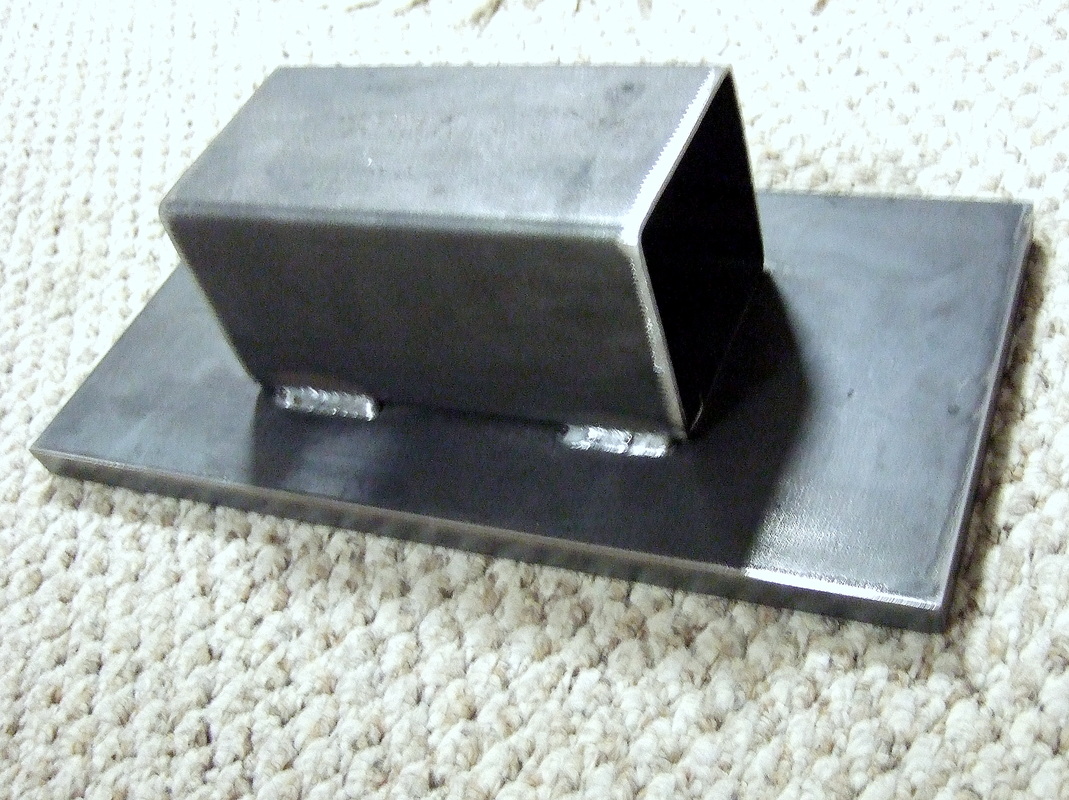
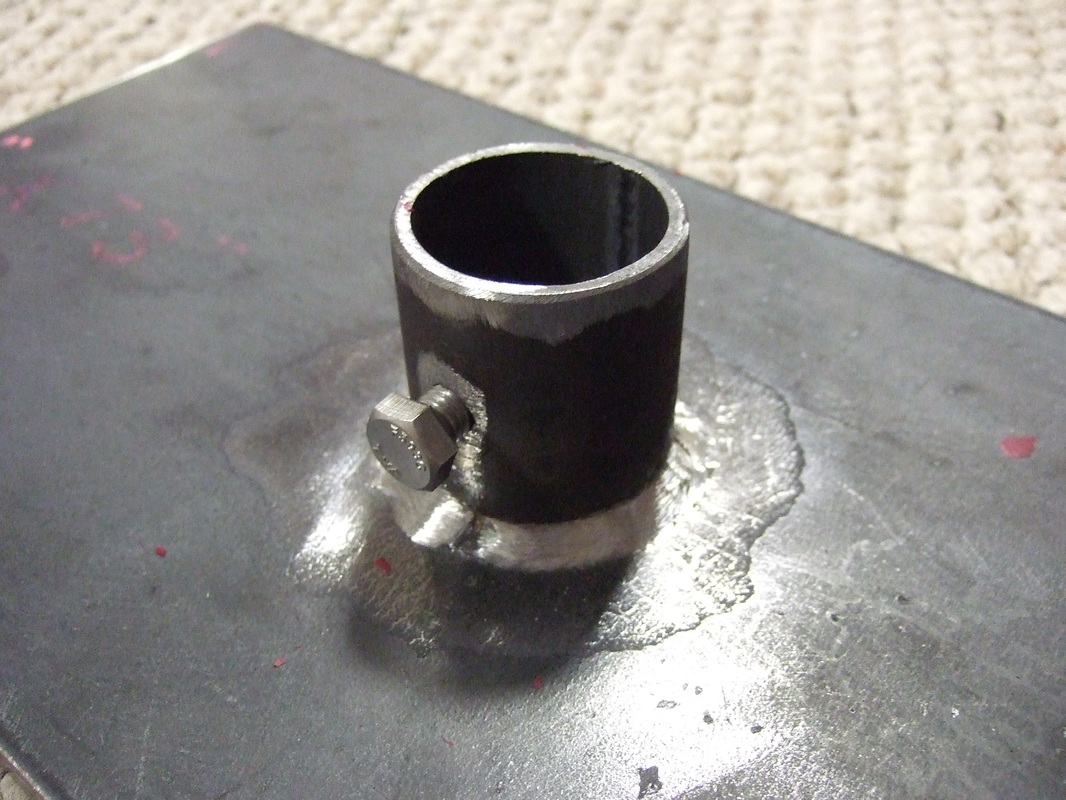
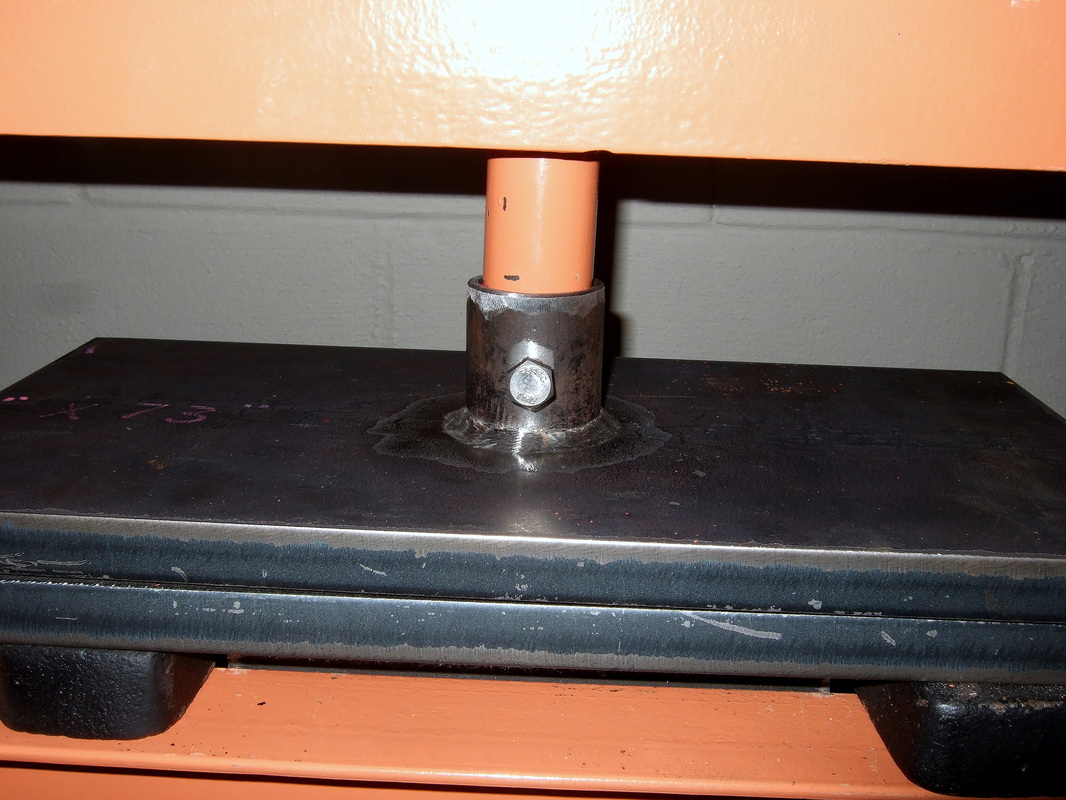
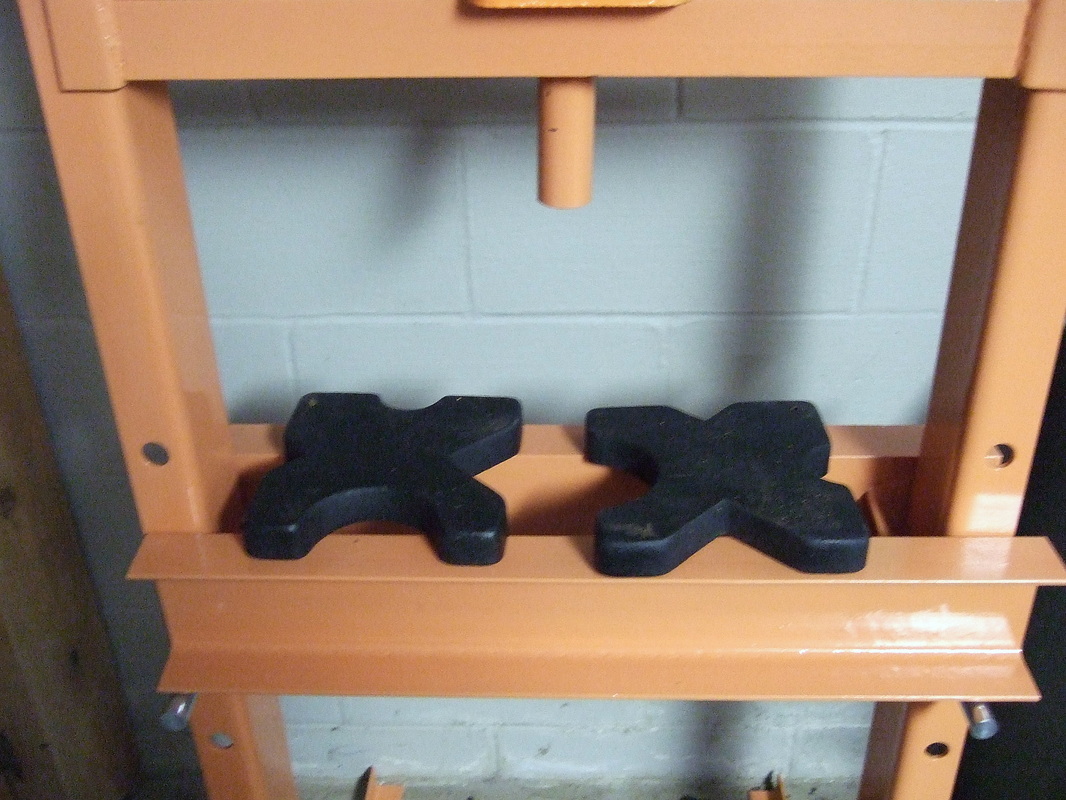 Harbor Frieght 20 ton hydraulic press (original) Harbor Frieght 20 ton hydraulic press (original) Installation The new platens are SUPER heavy. I can't lift them. All the installation was done by someone larger. Here is a shot of the original center section of the press. The two black X-shaped steel pieces came with the press. We decided to use them as spacers under the bottom platen but they can be set aside to make more vertical space. The top crossbar in this image hangs from springs. The bottom crossbar height is adjustable and can be moved lower on the frame to accommodate larger work. Top Platen My plan was to cut off the round vertical rod and weld a new platen to the top crossbar. Instead, the craftsman proposed welding a pipe onto the new platen to fit over the vertical rod. I decided to go with the adapter simply to preserve the original functionality of the press. (Update 1/31/2015: is this the best design? See section A Few Notes, below.) To install it, we placed the top platen on top of the bottom platen and then pumped the jack to lower it. Once the rod was completely in the cylinder with platens pressed tightly together, the pressure screw was tightened.
A Few Notes I'll update this as I work with the press.
Reader Comments (Updates after 1/31/2015) Holy moly, Batman. It turns out the best part of this project is YOU. The comments below are a must-read for anyone researching a project like this. There are some differing viewpoints but sort through them to determine what fits best for your needs. These are just a few highlights:
Wrap-up I didn't say a word about how this press is used for jewelry and small metals. Most of you are still reading this because you already know, right? Maybe I'll show some pieces in a future post but in the meantime see this google search for hydraulic press jewelry. 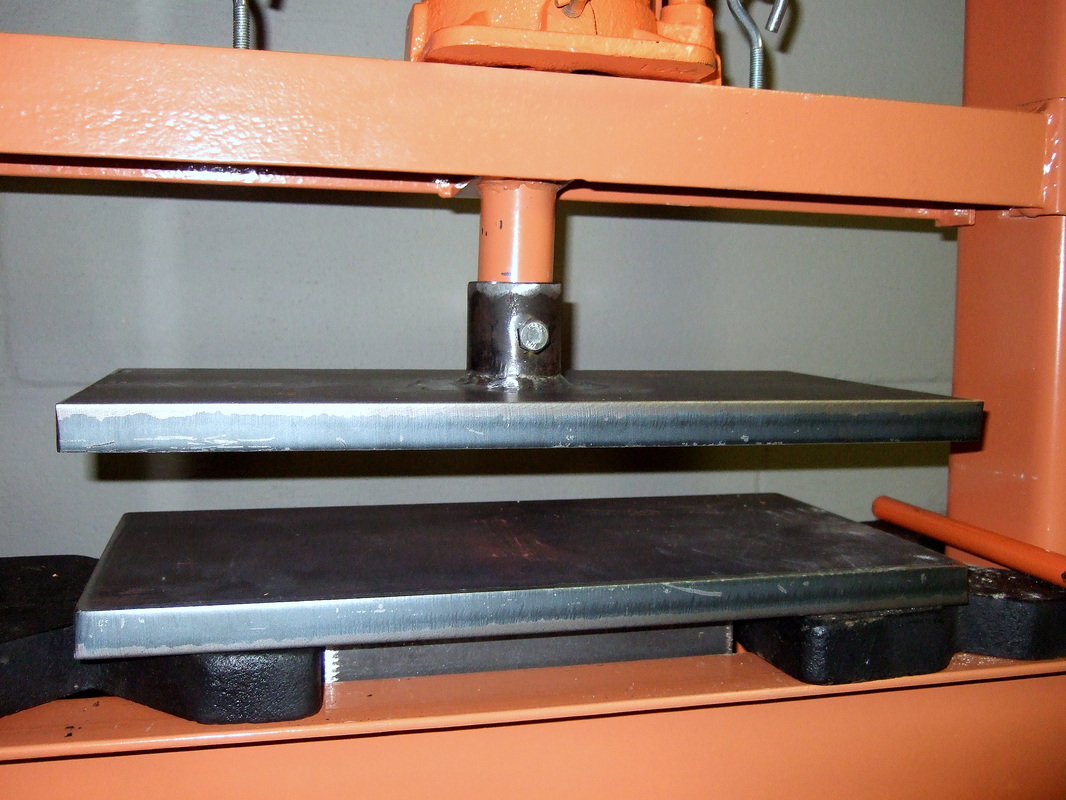 Both plates fully installed Installed and Ready When we released the pressure, each platen was securely in place and ready to go. Pretty darn cool if you ask me :-) OK, your turn-- leave me a comment!! Tell me what you think. Sue :-)
73 Comments
|

Sue Lacy WiredThis began as a hobbyist's blog. Over time it became a quest to support & connect metalsmiths around the globe who use foldforming techniques in their work. See how it all turned out: www.foldforming.org Archives
July 2016
|