
|
In my last post I showed you the hard way to recycle silver. This is the easy way -- and definitely my standard choice. I mail my scrap to a supply company (Rio Grande), and they pay me cash for it -- or give me a little bit more in credit toward purchase. (And no I don't work for Rio Grande, I'm just a happy customer.) This is a photo of the scrap I am mailing tomorrow. In exchange, I will order a beautiful sheet of sterling silver like the one shown on the left. It is SO much easier than melting it myself. 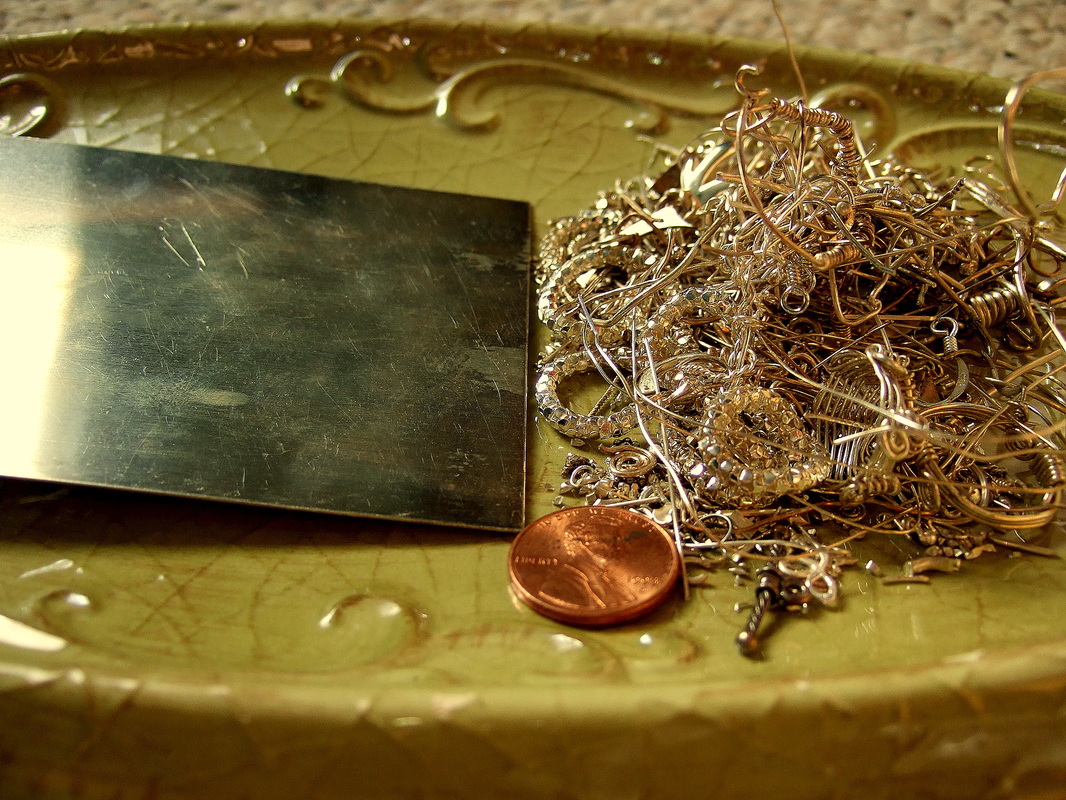 You might have silver to recycle, too. A few things in my pile are just rejects from my jewelry box. One is a heavy sterling chain that has never laid flat. It's just a poor design. I'm also sending two ugly charm-bracelet charms I've had forever. You might want to check your stash and see if you have any rejects of your own just taking up space. This is a good time to sell! As you may know, at this writing sterling silver (925) is at $25.95 a troy ounce. Recently it hit $30.00. If you aren't sure how that compares historically, first take a seat...no really, sit down before you fall down... and then absorb this ten year chart. Ten years ago an ounce sold for $5.00!  Chart from http://www.kitcosilver.com/charts.html I also promised to show an example of my jewelry using each of the three silver recycling methods I've used. After turning in scrap metal, I used that company credit to purchase sterling wire and sheet. This piece was made from sterling silver wire, commercial sheet silver, a single freshwater pearl, and a heavy dose of imagination. 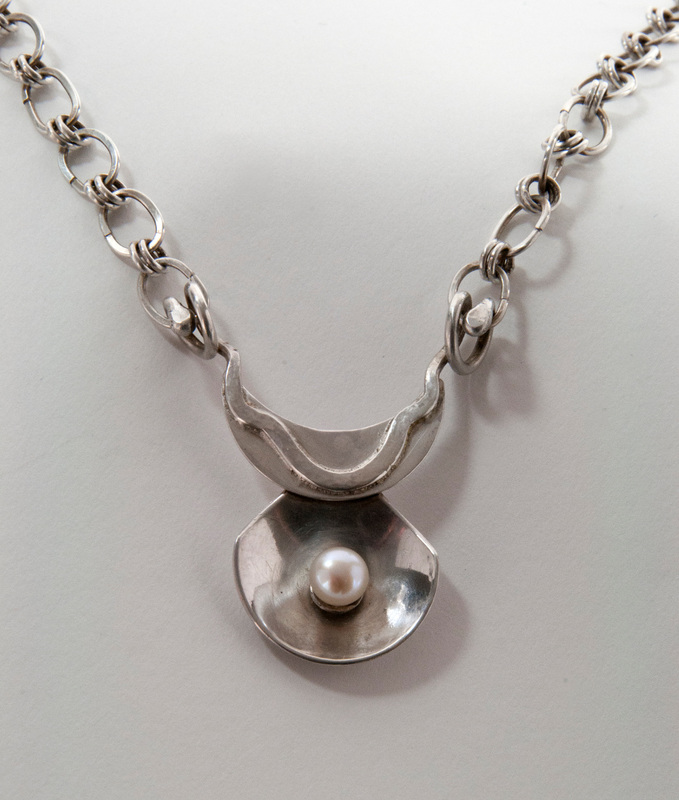
0 Comments
This is a story about the silver used in this pendant. 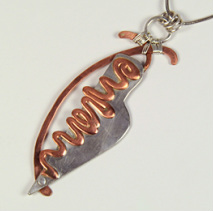 The story begins with a scrap jar full of tiny sterling silver leftovers. Check out the 1/21/2011 blog post for a snapshot of my typical scrap. On this day, I also raided my jewelry box for old sterling silver jewelry that was broken or unwearable, and topped off my scrap heap with those. Let's just take a moment to say DON'T try projects at home that require a torch unless someone teaches you how. This isn't a lesson! :-/ I will write about some fun recycling projects later in the series that you can try, ok? So this is approximately what the melting process looked like (file photo): 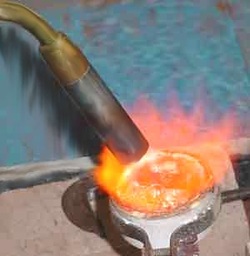 A heavy crucible is coated with a borax mixture that creates a glass coating when fired. Scraps of sterling silver are dropped into the crucible a few pieces at a time while the whole thing is hit with a very hot torch. The pieces start melting quickly, but it takes quite awhile to melt the entire bunch of scrap into one big molten puddle. Next, the crucible is tipped over a fireproof pan to let the molten silver flow out. It starts to cool and harden right away. The flow is adjusted out across the pan to avoid making a mountain of silver, since the goal is to create a sheet. The resulting sheet is very thick, so the next step is to run it through a rolling mill a gazillion times until it's thin enough to use. This process hardens the metal again, so after every couple trips through the mill the metal is annealed -- or heated with a torch until it's pliable again. This is a cheater picture of the rolling mill process. The piece is already finished to 18 gauge and cut for the project, but you get the idea. The dials at the top control the gap size between the rollers, and the handle on the right gets the rollers moving. The piece is squashed as it goes through. 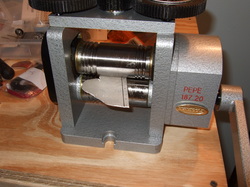 The final sheet of sterling silver looked like this. It's already cut apart, but I put it back together for you to see. It measures about 3.75" x 3.5" at its longest points. The upper right piece is a partial photo of the pendant, above, so you can see where the silver fit. I thought that corner of the natural poured metal was beautiful, so I cut it off as-is and worked it into my design. 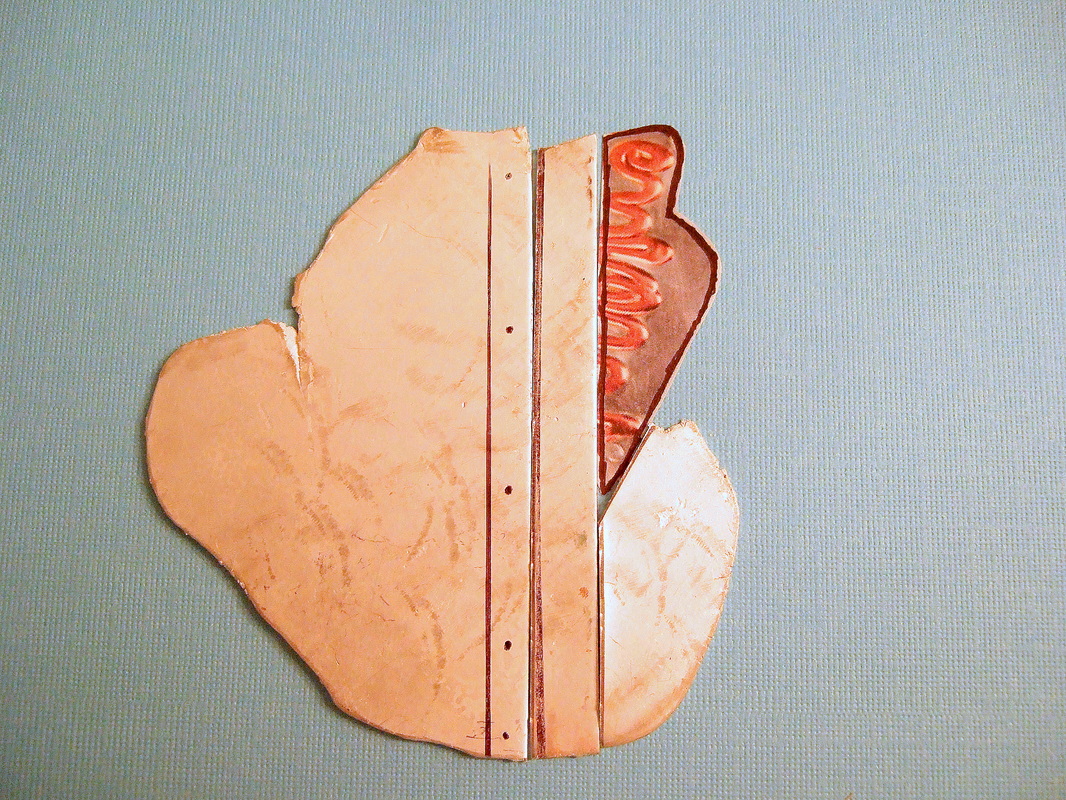 The two vertical strips in the middle will be rings someday. As for the rest, who knows? I'll keep you posted!
Yesterday's blog entry featured a photo of scrap sterling silver that I've collected over time during the process of creating jewelry. The first recycling method I described is called fusing. Fusing is what happens when pieces of metal are heated to their melting point. They start to combine like two drops of water where they touch. Eventually, the metal will combine to form a perfect ball. The trick is to stop the heating process somewhere in between, when the parts combine but the design has not melted away. For this pendant, I chose some interesting pieces from my scrap sterling silver pile. After arranging them in a stacked, overlapping shape that I liked, I hit the piece with a torch flame until they fused. And by the way, that melting point is a toasty 1640 degrees (F). Let me know what you think of it! 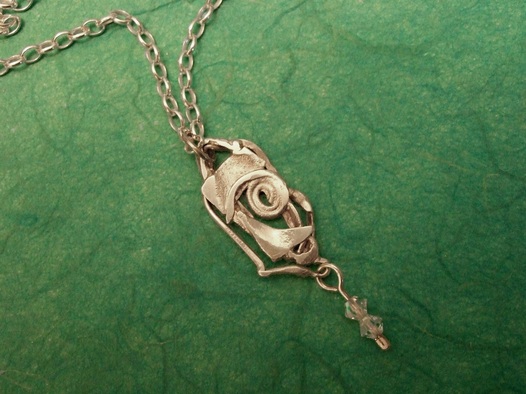 This is not a precision technique, but it's great if you're after a fun, artsy, free form piece. (Usually, silver is connected using tiny pieces of silver solder that melt at a lower temperature than the silver it is connecting.) Metal tends to take unexpected shapes during the fusing process as pieces start to melt. Smaller wire will shrink up quickly, curving or balling up. The curve at the bottom of this piece was an unexpected bonus, perfect for hanging a couple of pretty Swarovski crystal beads.
Stop back soon. Next time I'll show you what scrap sterling silver looks like after being melted in an in-home studio, and a pendant made from that recycled silver. I use recycled and up cycled materials in a lot of my work. I thought it might be fun to share what that means, and what it looks like. There is fair amount of scrap that comes with working metal. One of the most common types of scrap is barely the size of the head of a pin. When any wire is cut, one half is cut flush (flat) but the other half is left with a point. Before the pointed wire can be used, the end is usually flush cut -- leaving a tiny bit of scrap silver on the cutting room floor (a.k.a., the scrap jar.) Other scrap is just made up of odds and ends that get cut off during assembly, or they might result from mistakes or mid-process design changes. Over time, these tiny pieces really add up. This is my scrap silver at the moment: 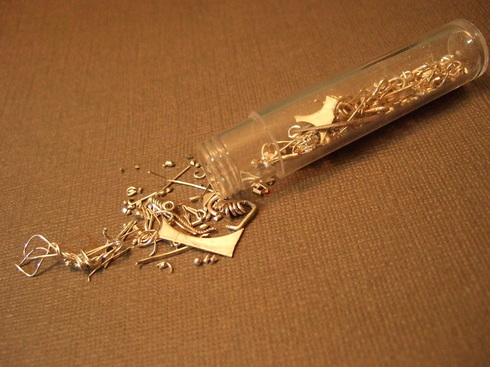 What can be done with scraps like this?
1. The scraps can be incorporated into pieces as-is, using fire, guts, and creativity. 2. They can be shipped off to a metal supplier, where the scrap is analyzed, melted, and poured to create brand new wire and sheet metal. 3. The scraps can be melted at high temperature in a home studio, then poured to make sheet metal. I prefer option 2 but have dabbled with the other methods. Tomorrow I'll post some examples of each, and later hope to post photos of completed pieces using each method. |

Sue Lacy WiredThis began as a hobbyist's blog. Over time it became a quest to support & connect metalsmiths around the globe who use foldforming techniques in their work. See how it all turned out: www.foldforming.org Archives
July 2016
|